Scheduled Jobs
The Scheduled Jobs component in the Timbr platform is for users that have enabled the cache mechanism in Timbr and set scheduled jobs to cache either mappings or views. Users can manage and edit existing jobs, running jobs, create future jobs, or review past jobs.
The Scheduled Jobs component centralizes every cache done in the Timbr platform, regardless of if it was made from the Data Mapper, Ontology Views, SQL Editor, or even if it was triggered outside of Timbr using an SQL endpoint connected to the platform.

Jobs
When entering the Scheduled Jobs page, the default tab that appears is the Jobs tab, which presents all the information on current Jobs that are scheduled by the users.
In the center of the screen is the list of all the current jobs that are scheduled. The list contains the following columns:
- Job - Presents the title of the jobs. When hovering over the tooltip, you can see the resource name and the user who scheduled the job.
- Job Type - Presents the type of each job.
- Knowledge Graph - Presents the name of the Knowledge Graph that the job is taking place on.
- Datasource - Presents the Datasource where the job will run.
- User - Shows the user who scheduled the job.
- Next Schedule (UTC) - States the exact time and date on which Timbr will run or refresh the job.
:::tip fyi It’s important to mention that by default Timbr will show times in the UTC format, but when hovering over the tooltip, users can see the next schedule according to their local time. :::
- Refresh Rate (UTC) - States the refresh interval rate for the job if any was defined.
- SQL - When hovered on, shows a preview of each cache query and its SQL syntax.
- Actions – There are 3 options under actions which are:
- Run job – When the triangle play button is clicked on the selected job will begin running.
- Edit job – When the pencil icon is clicked on an edit job window will appear.
- Remove job – When the trash can logo is clicked on the selected job will be removed from the list of current jobs.
Above the list of jobs and beneath the 3 tabs is the upper filter pane which contains the following options:
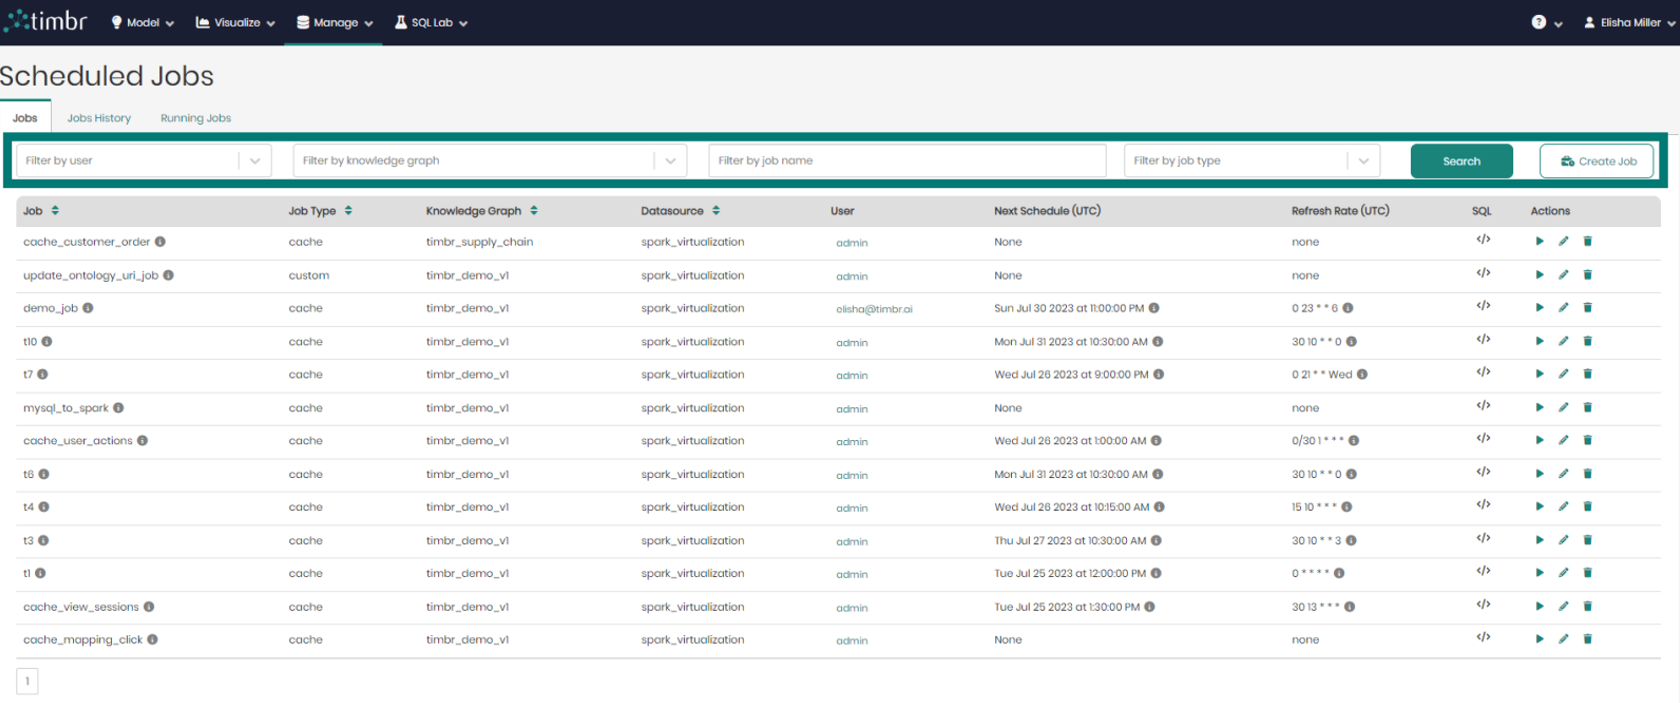
- Filter by user - Enables searching through and filtering the jobs by specific users.
- Filter by knowledge graph - Enables searching through and filtering the jobs performed on any specific knowledge graph.
- Filter by job name - Enables searching through and filtering the jobs based on the job name in free text search.
- Filter by job type - Enables searching through and filtering the jobs based on the job type, being either a cached, custom, or cache incremental job.
- Search – Clicking on search performs the filtering based on the parameters chosen in the dropdowns on the left.
- Create Job – Opens a window in order to create a new job.
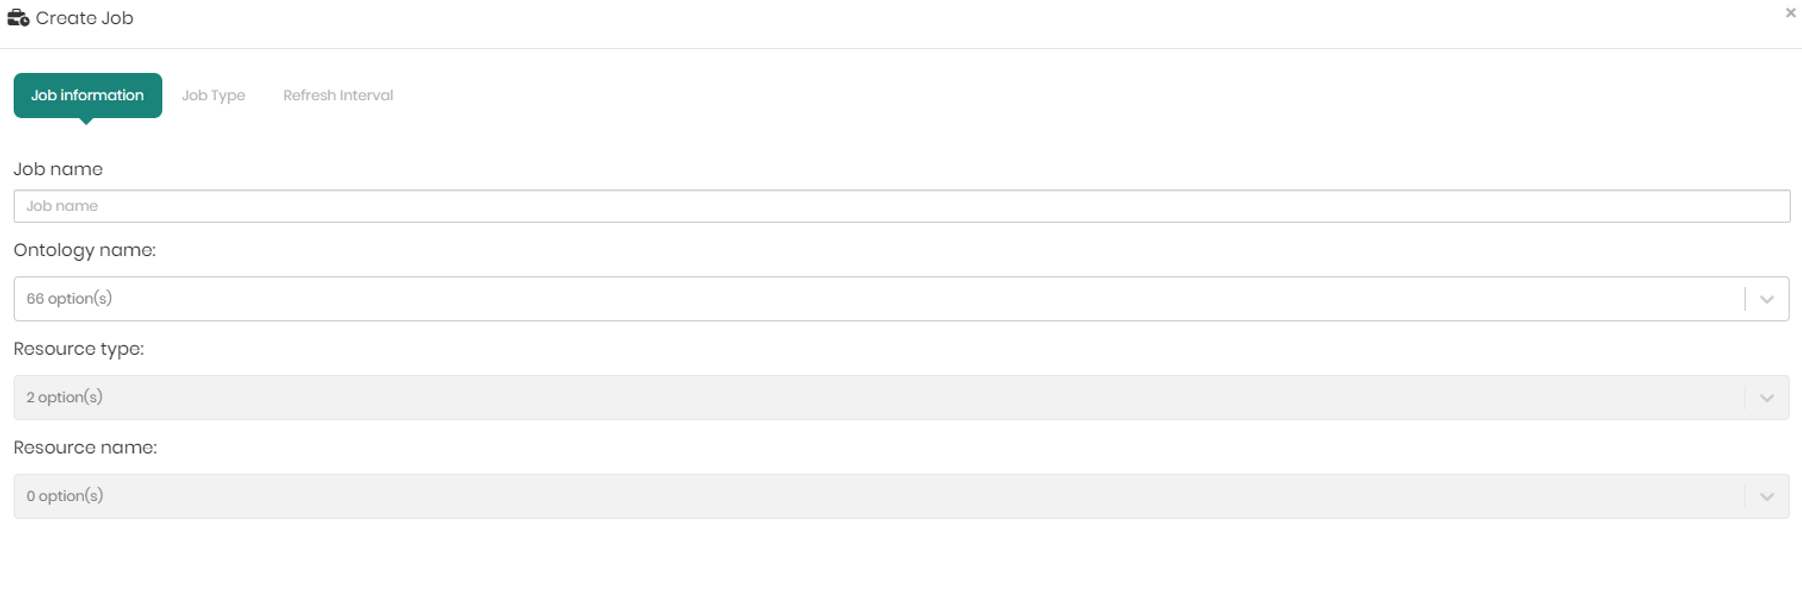
The create job window that appears contains 3 tabs which are Job Information, Job Type, and Refresh Interval which are in charge of the following:
Job Information – In the job information tab there are 4 dropdowns to choose from:
- Job name – To name the job.
- Ontology name - To choose the relevant ontology.
- Resource type- To choose the resource type to cache, either a mapping or a view.
- Resource name - According to the resource type, Timbr will present the mappings or views of the selected ontology to choose the resource you would like to cache.
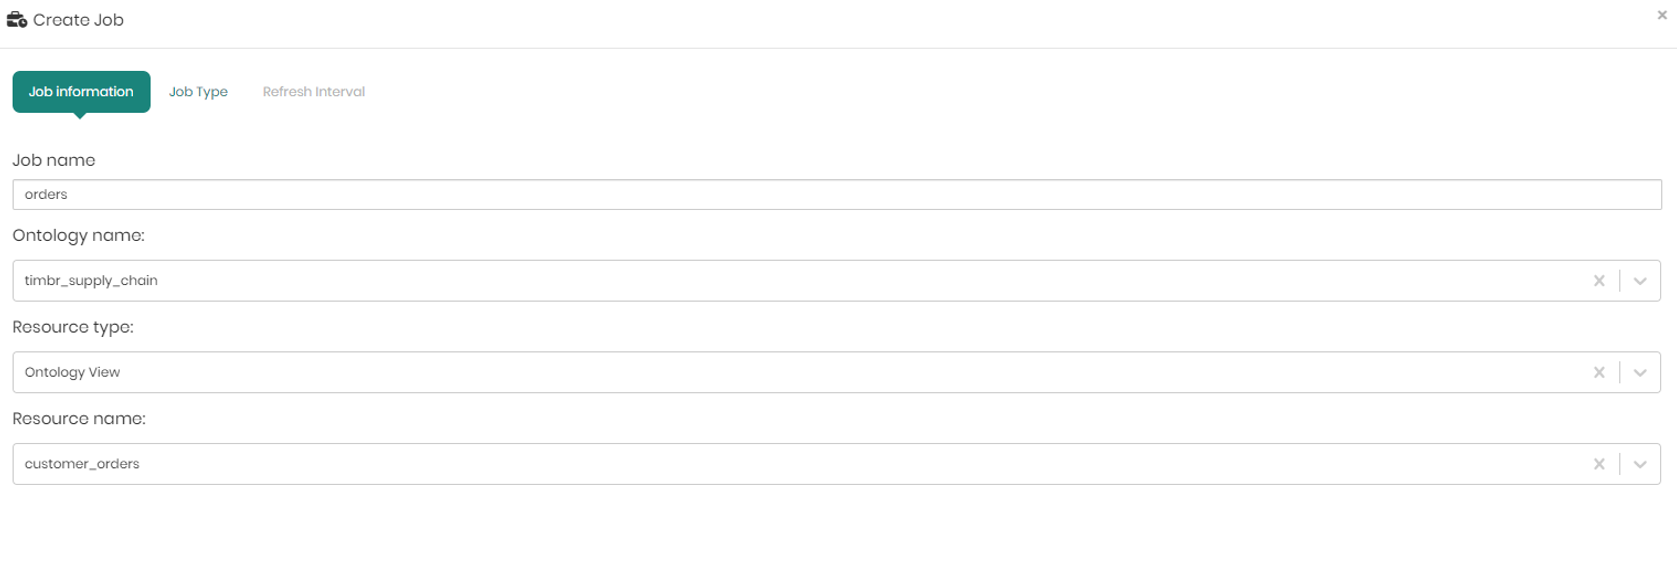
Once the information is filled in, click Next to move to the next tab – Job Type.
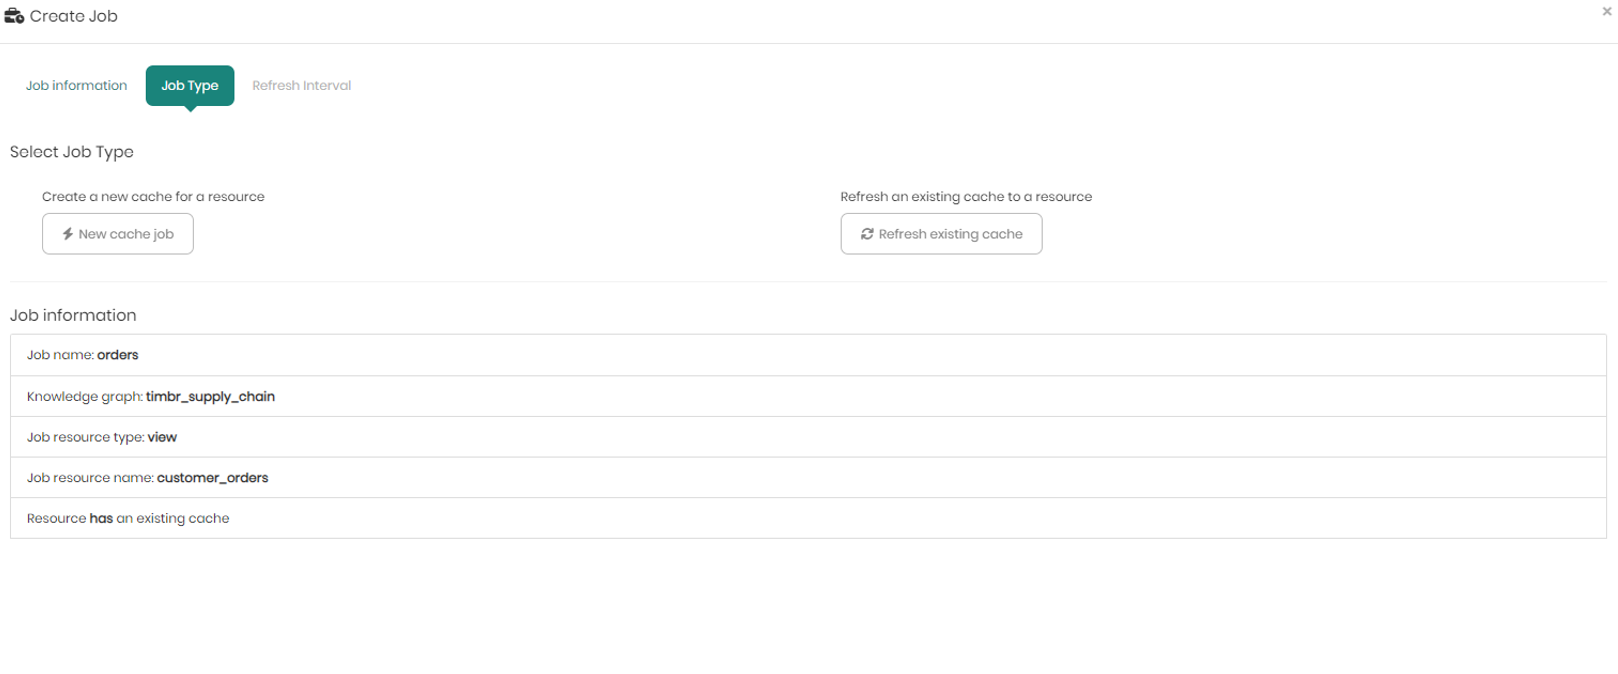
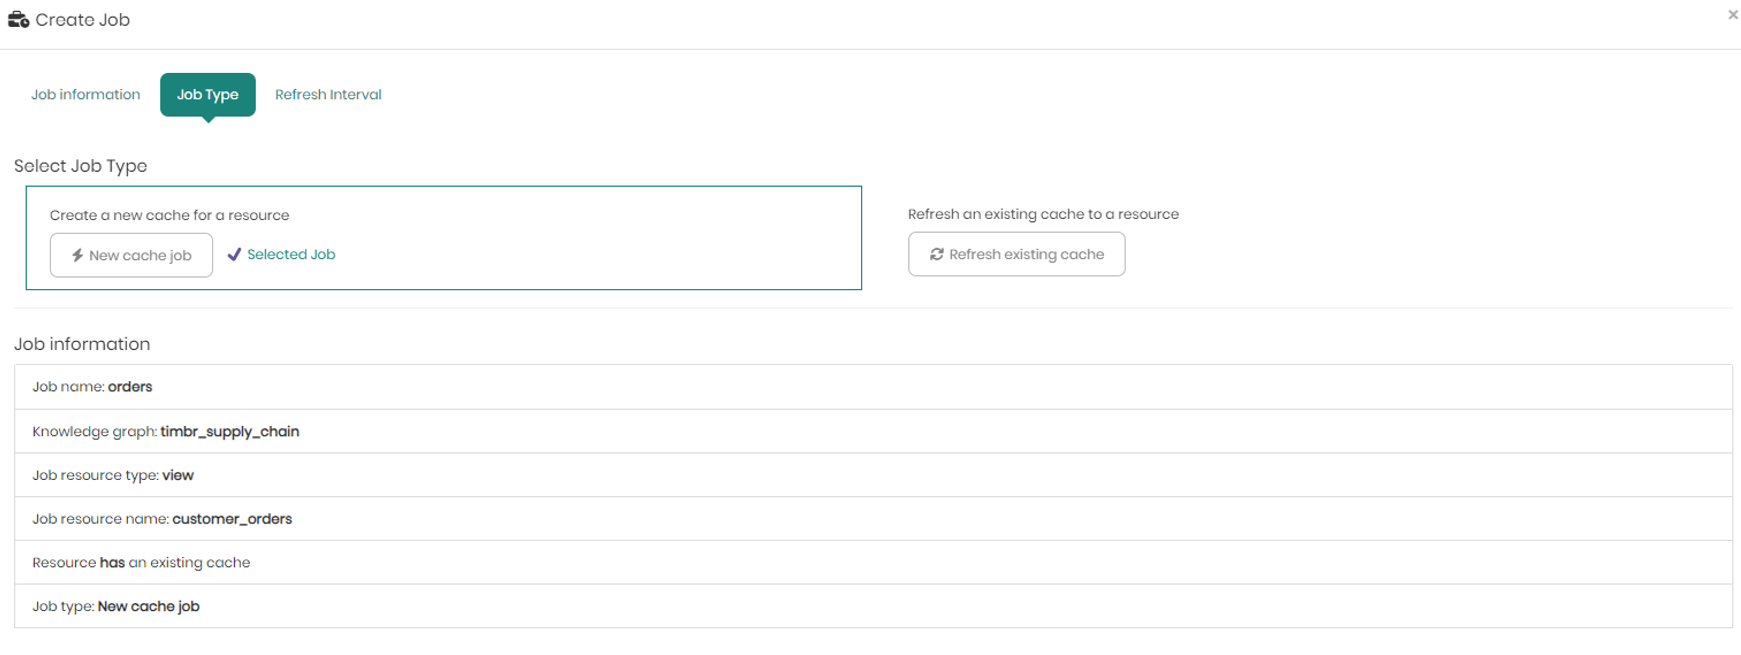
In the Job Type tab, you choose whether it's an existing cache job that you want to refresh, or if this is a new job for the chosen resource.
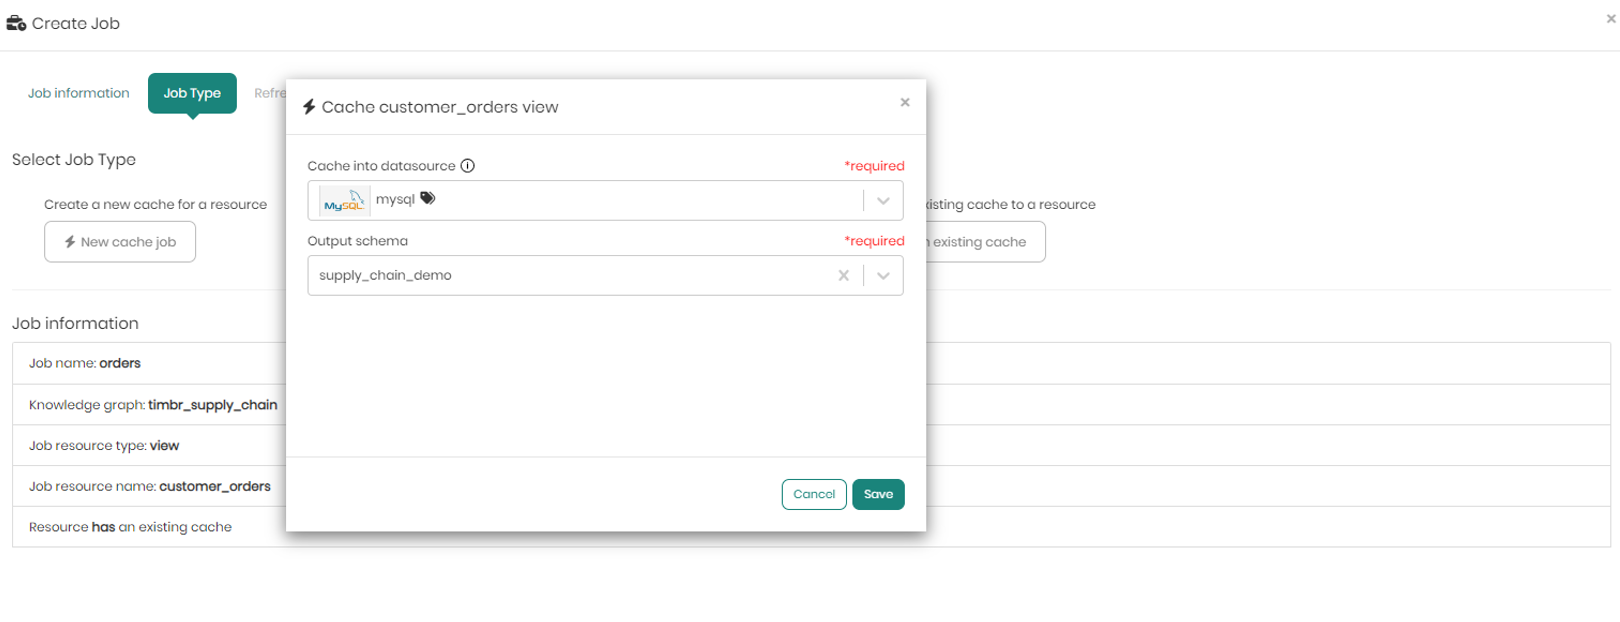
When clicking on New cache job, a pop-up window appears asking to choose the datasource and schema to store the cache in. Once chosen click on Save to move on to the third and final tab.
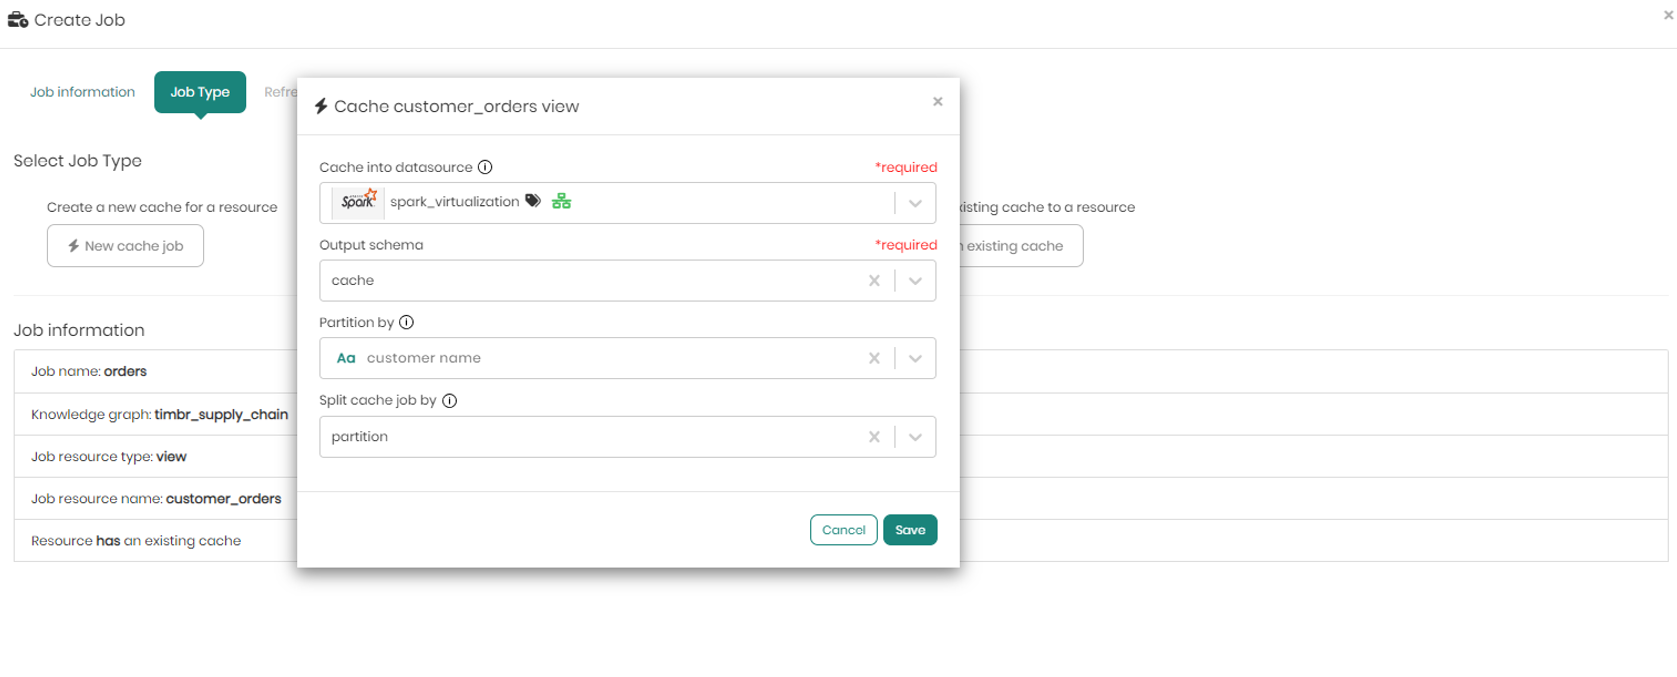
:::tip note When choosing a virtualization engine such as Spark or Databricks, there will be an additional option to partition, in case you want to partition the cache by a certain column. This is a very useful feature to have when dealing with big tables and large amounts of data to apply incremental refresh of the cache instead of caching the entire data each time. :::
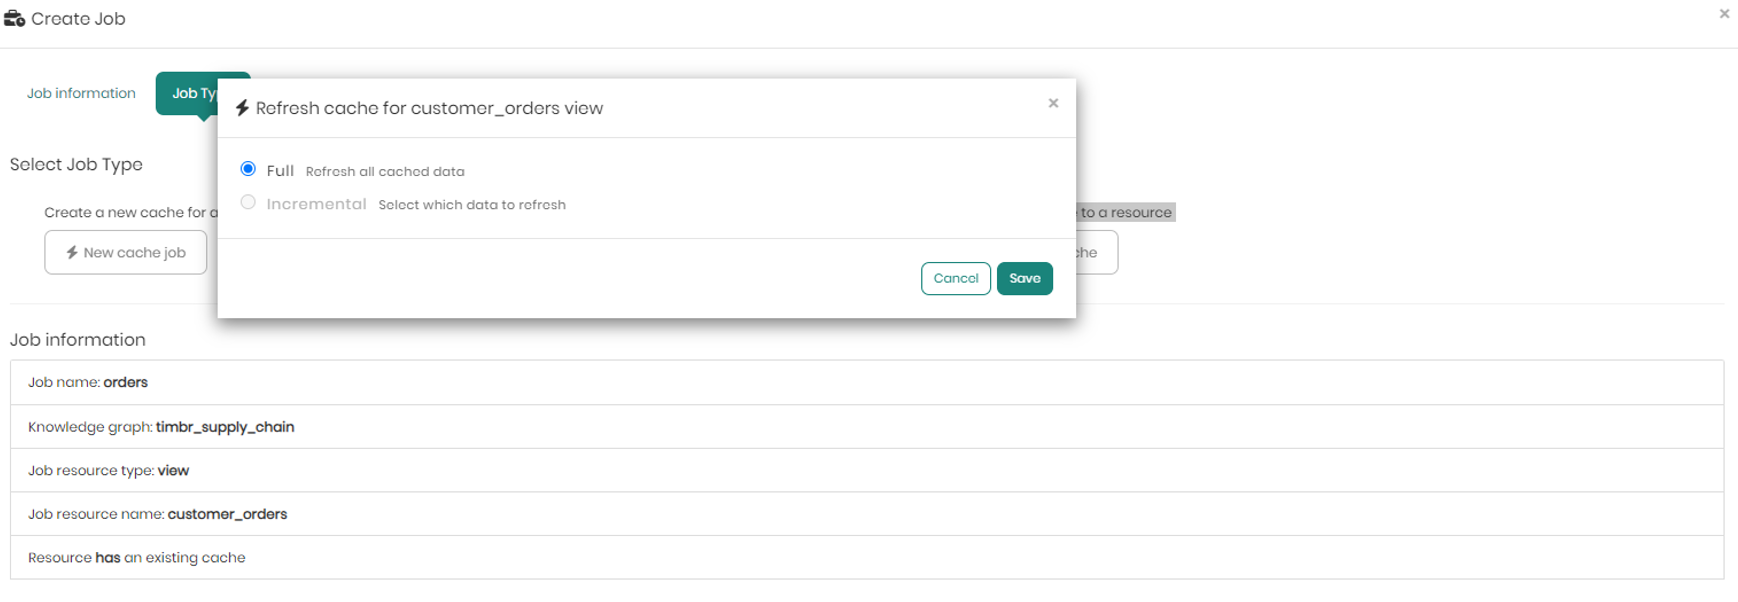
When choosing to refresh an existing cache to a resource instead of creating a new one, a pop-up will appear enabling us to choose whether to perform a full refresh on all the cached data, or instead perform an incremental refresh selecting which specific data to refresh (valid only for data lakes or virtualized data sources with partition).
On the bottom half of the screen in the Job type tab, you can see the job information including the Job name, Knowledge graph, Job resource type, Job resource name, whether or not the resource has an existing cache or not, and finally the Job Type if a new job was selected.
Once selecting the new job with its data source and schema, and a partition column when relevant, move on to the third and final tab - Refresh Interval.
In the Refresh Interval tab you can define the cache refresh Interval with the following options:
-
None - Without a refresh, for tables that doesn’t require a refresh interval
-
Daily - Executing the current job on a daily interval
-
Monthly - Executing the current job on a monthly interval
-
Yearly - Executing the current job on a yearly interval
-
Custom - When choosing custom users use the standard CRON options as if you ran a cron job before with the following options:
- Minutes – Choosing any minute within the range of 0-59 representing the minutes in each hour.
- Hours - Choosing any hour within the range of 0-23 representing the 24 hours in each day.
- Days of month – Choosing any day of the month within the range of 1-31 representing the maximum 31 days of a month.
- Months - Choosing any of the months within the 12 months of the year.
- Day of the week - Choosing a specific day within the 7 days of the week, regardless of the numeric date on that day.
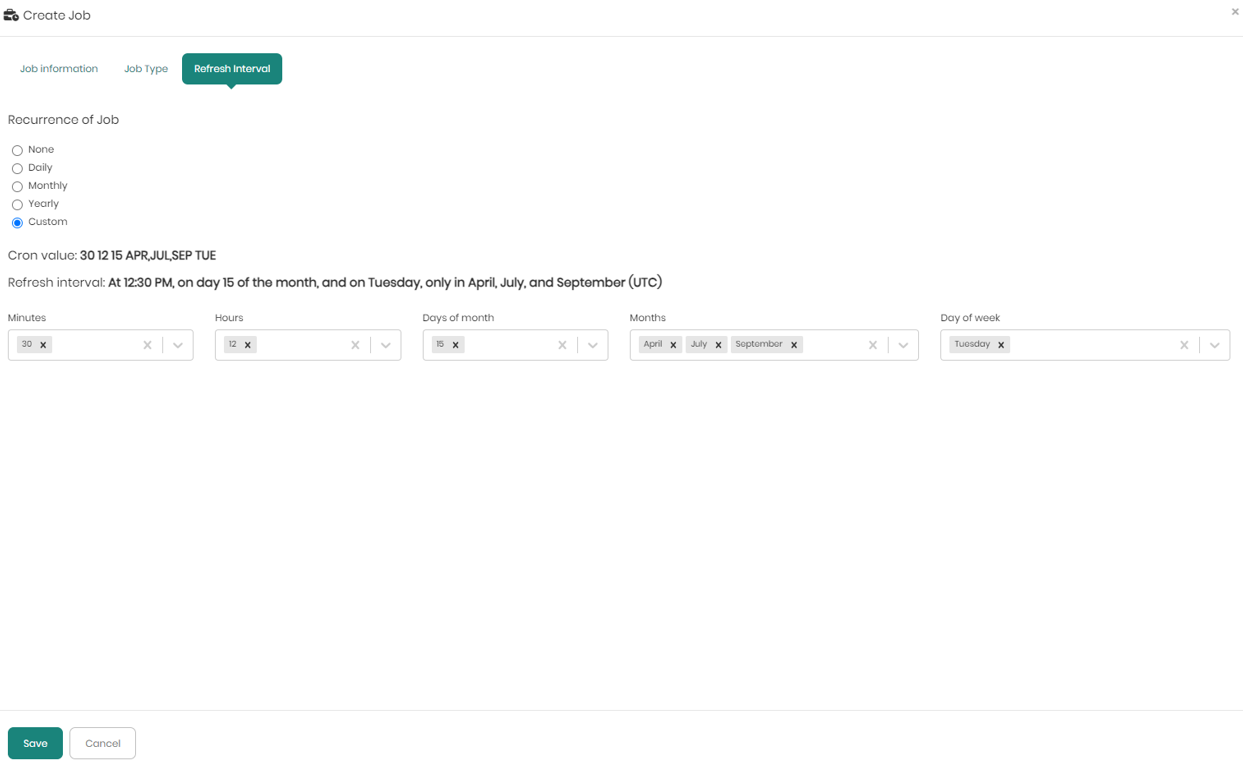
Once the values are chosen in the dropdowns the Cron value and Refresh interval will be presented above the dropdowns. To save the job and the chosen refresh interval Save must be clicked on the bottom left.
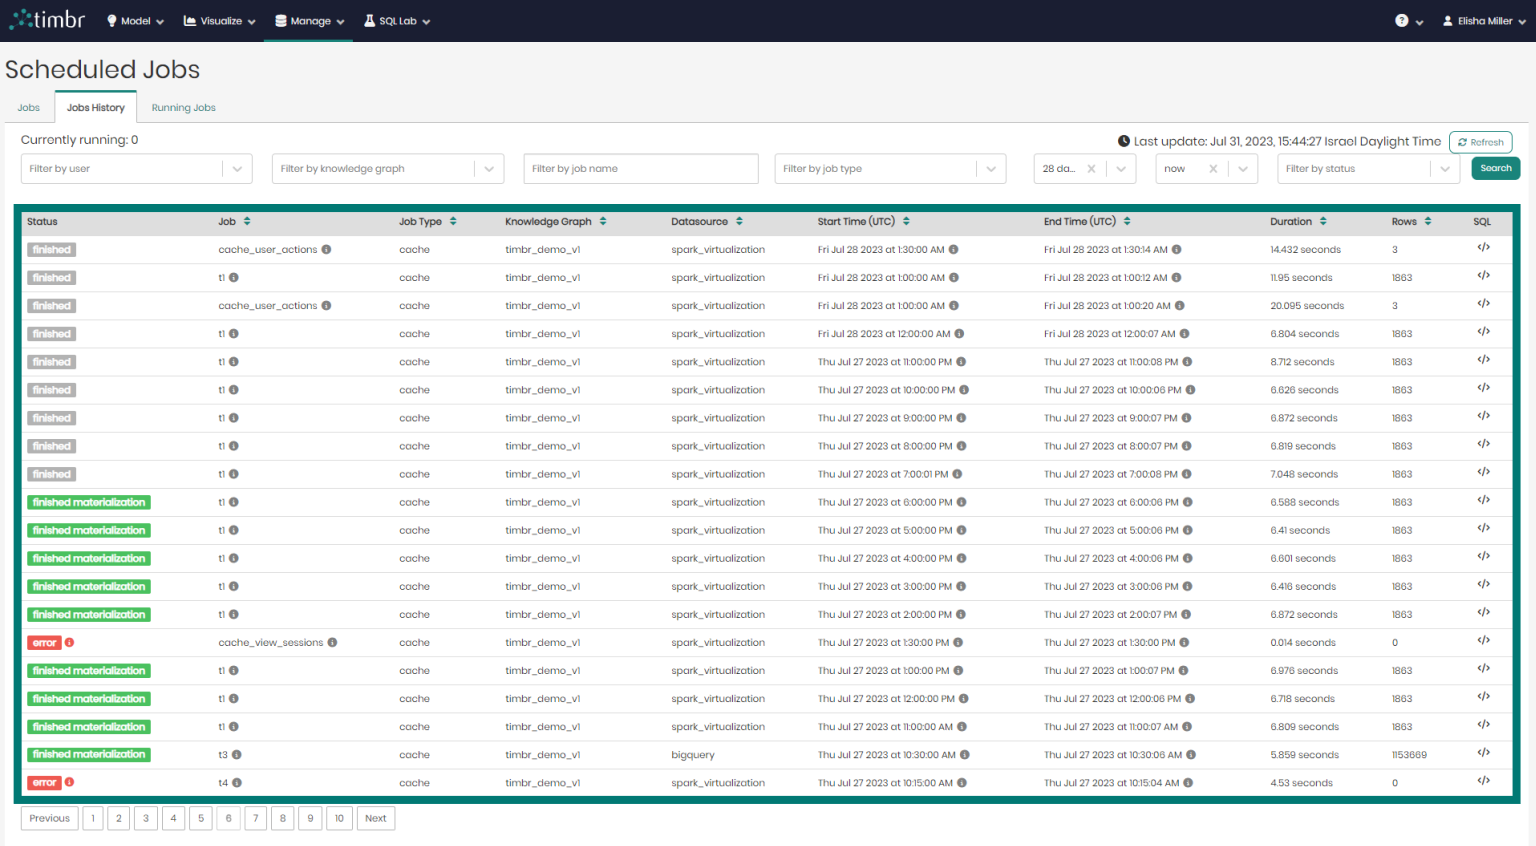
Jobs History
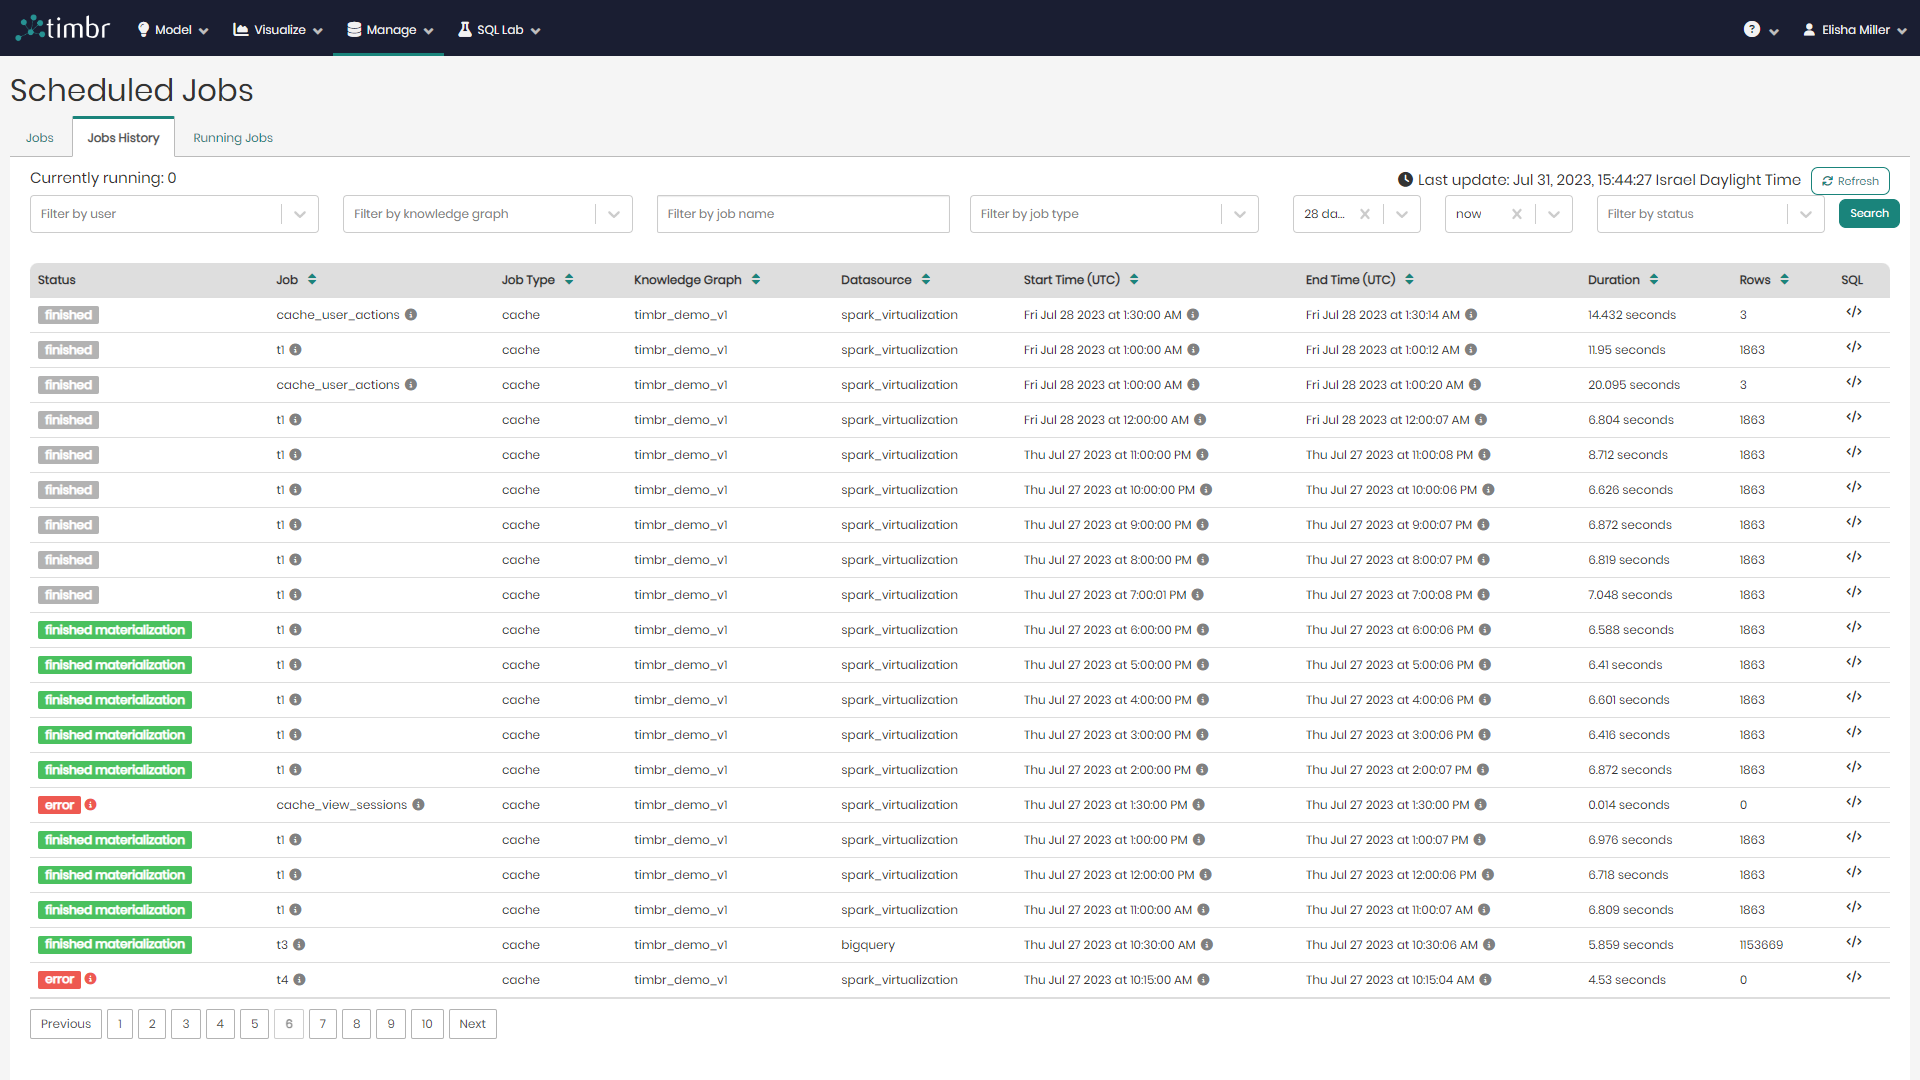
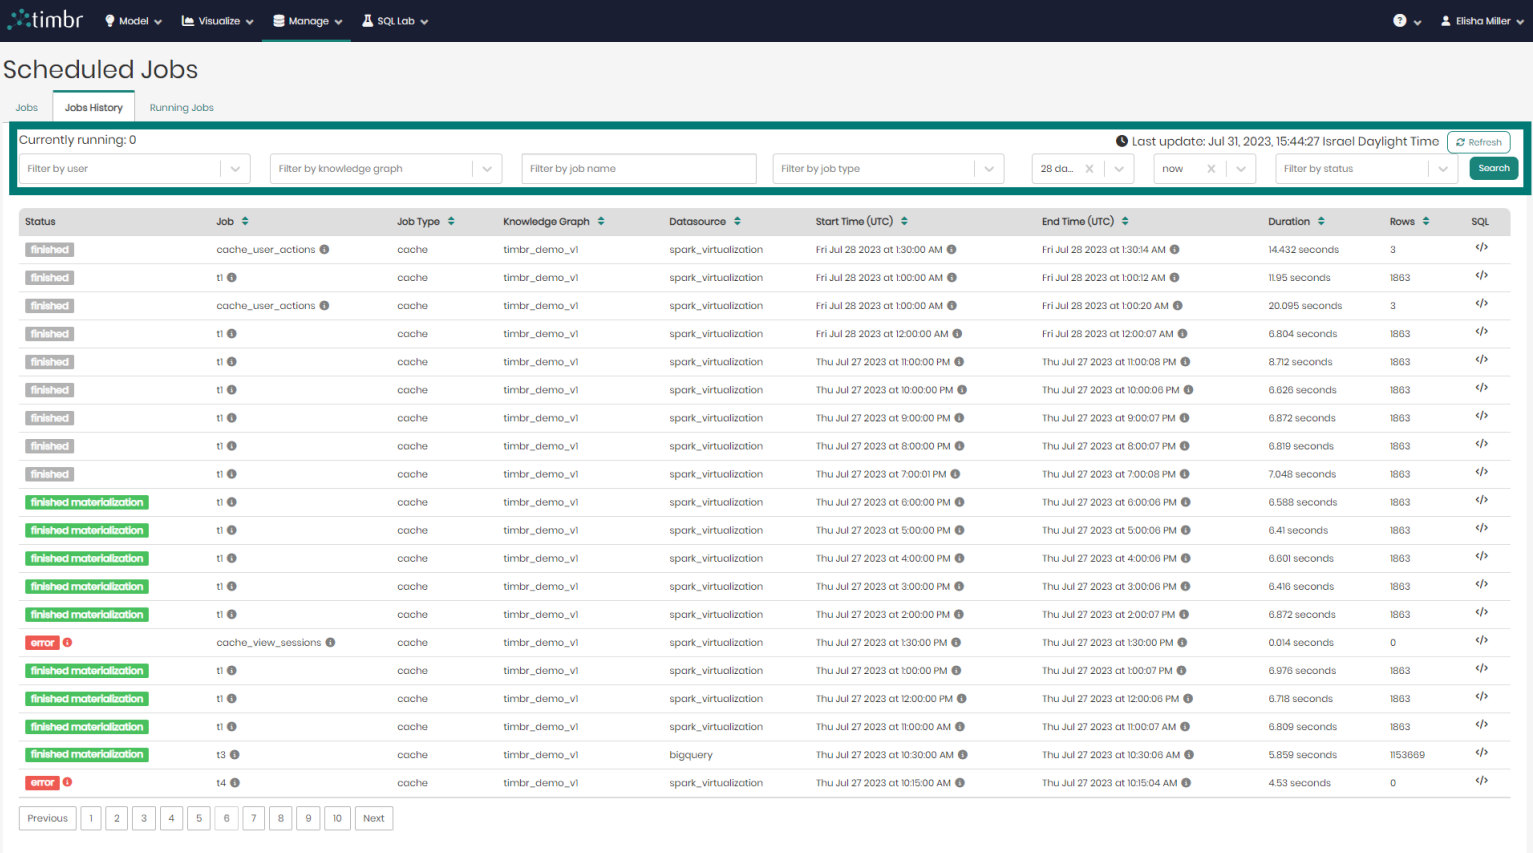
The second tab in the Scheduled Jobs page is the Jobs History tab, which presents all the historical cached jobs performed by users.
beneath the tabs is the upper filter pane which contains the following options:
Currently running - Presents the number of cached jobs that are currently running.
Filter by user - Enables searching through and filtering the cached jobs by the specific user who performed the caching.
Filter by knowledge graph - Enables searching through and filtering the cached jobs performed on specific knowledge graphs.
From & To - Enables searching through and filtering the cached jobs based on a specific time frame that they were performed at.
Filter by status - Enables searching through and filtering the cached jobs based on a specific cached status such as finished materialization or error.
Refresh - Performs a refresh on the list of historical cached jobs.
Search - Performs a search on the cached jobs based on the parameters chosen in the various filters.
Beneath the upper filter pane is the entire list of historical cached jobs. The list contains the following columns:
- Status - Presents the status of the cached jobs.
- Job - Presents the title of the cached jobs.
- Job Type - Presents the type of each cached job.
- Knowledge Graph - Presents the name of the Knowledge Graph that the cached job is taking place on.
- Datasource - Presents the Datasource that is being used in each cached job.
- Start Time - States the exact time and date each cached job began on.
- End Time - States the exact time and date each cached job finished running at.
- Duration - States the amount of time each cached job ran for.
- Rows - Shows the number of result rows that were present in each cached job.
- SQL - When hovered on, shows a preview of each cached query and its SQL syntax.
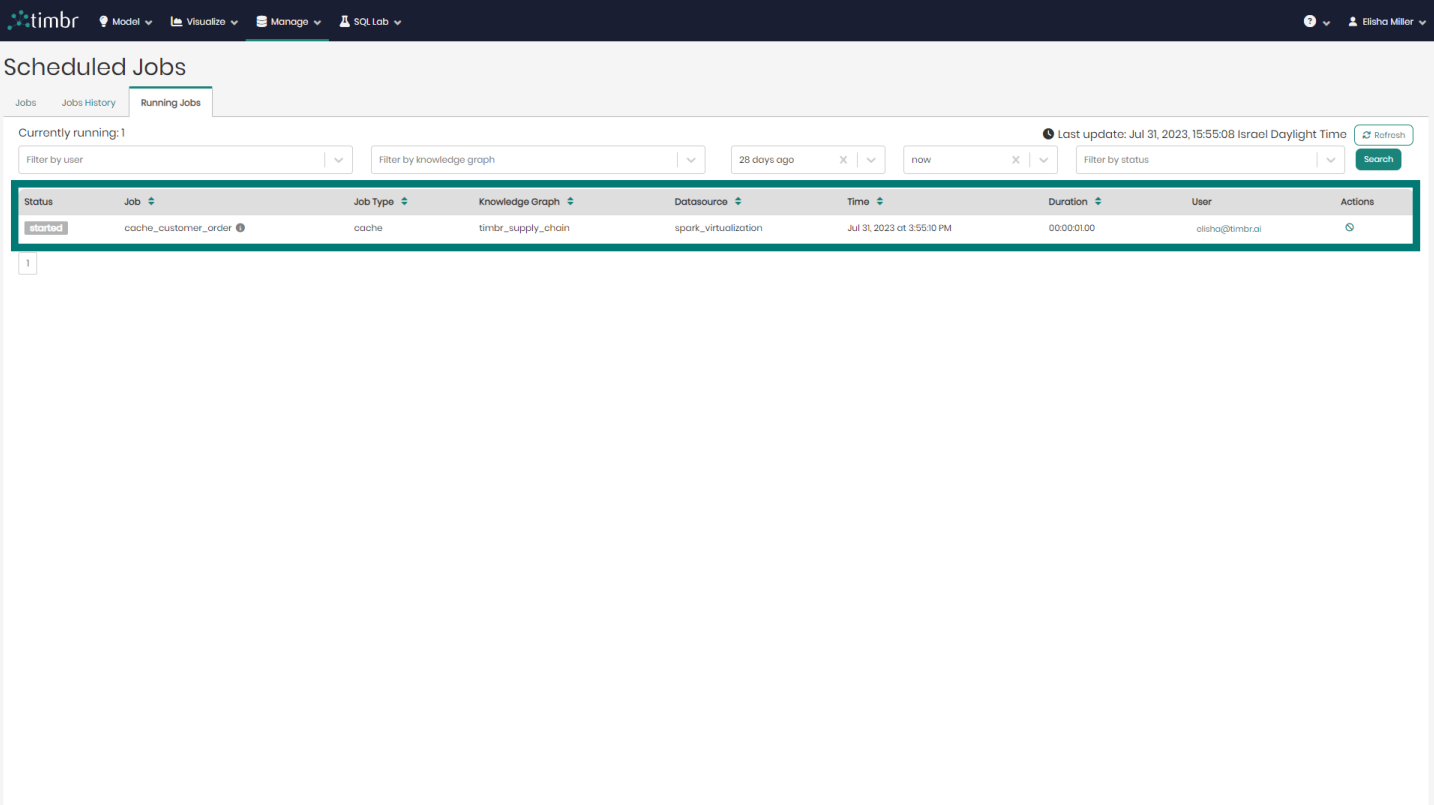
Running Jobs

The third tab that appears on the Scheduled Jobs page is the Running Jobs tab, which presents all the information about currently running Cached Jobs.
Similarly to the other 2 tabs, here too there's an upper query pane that contains the following options:
Currently running - Presents the number of cached jobs that are currently running.
Filter by user - Enables searching through and filtering the currently running cached jobs by the specific user who performed the cached job.
Filter by knowledge graph - Enables searching through and filtering the cached jobs that are currently running on specific knowledge graphs.
From & To - Enables searching through and filtering cached jobs that are currently running based on a specific time frame that they were performed at.
Filter by status - Enables searching through and filtering the cached jobs that are currently running based on a specific cached status such as finished materialization or error.
Refresh - Performs a refresh on the list of cached jobs that are currently running.
Search - Performs a search on the cached Jobs that are currently running based on the parameters chosen in the various filters.
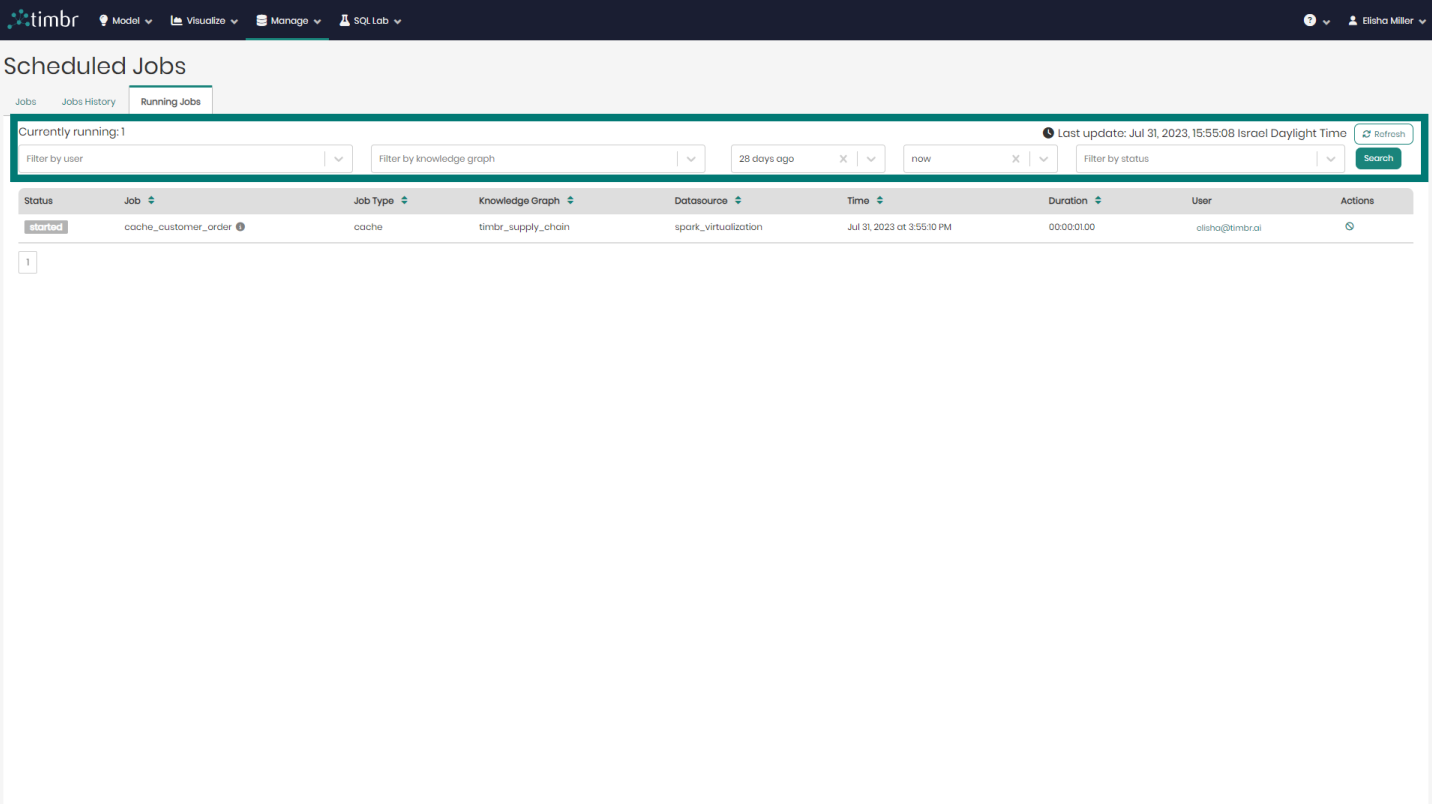
Beneath the upper filter pane is the entire list of cached Jobs that are currently running. The list contains the following columns:
- Status - Presents the status of cached Jobs currently running.
- Job - Presents the title of the cached Jobs currently running.
- Job Type - Presents the type of each cached job currently running.
- Knowledge Graph - Presents the name of the Knowledge Graph that the cached job currently running is taking place on.
- Datasource - Presents the Datasource that is being used in each cached job currently running.
- Time - States the exact time and date each cached job currently running began at.
- Duration - States the amount of time each currently running cached job has been running for.
- User - Shows the user who performed each currently running cached job.
- Actions - When clicked on, the currently running cache selected will be cancelled and will stop running.